
Candlestick Patterns That Actually Matter
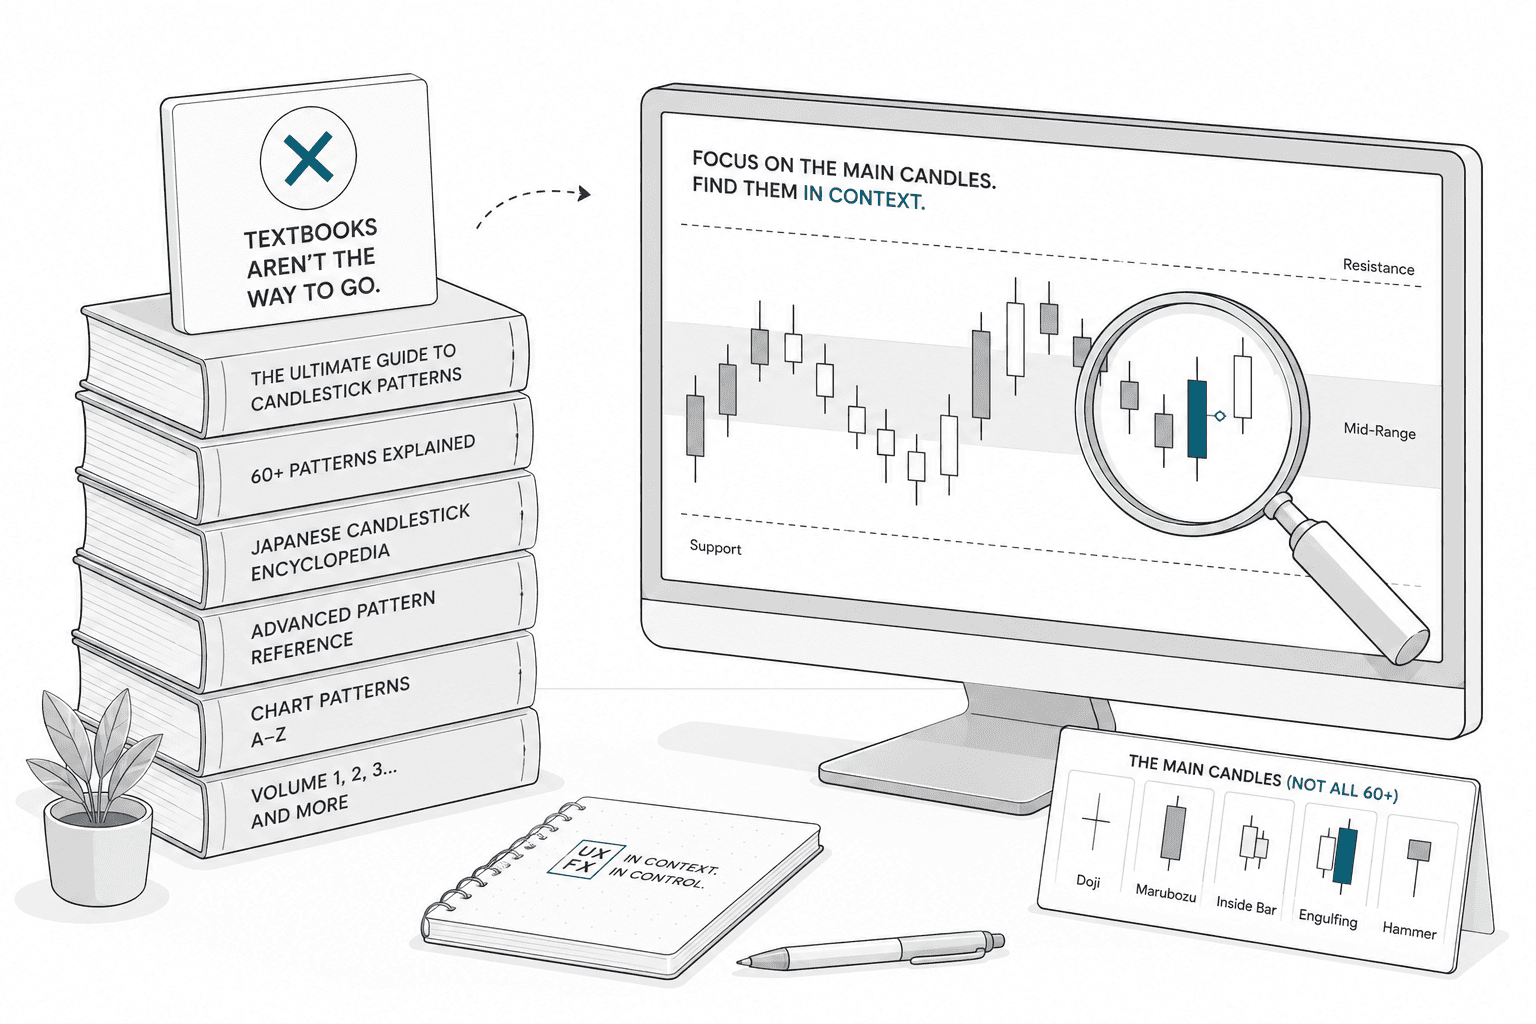
There are over 60 named candlestick patterns. Most of them don't matter. Here's the short list of patterns that consistently carry information — and what they're actually telling you about the market.
Learning Path Stage 2: Reading Charts
Learning Level 3: Application
Primary Learning Objective
By the end of this lesson, you will be able to identify the candlestick patterns with genuine utility and explain what makes them more reliable than the broader catalog of named patterns.
Read Candles Like a Trader, Not a Textbook
Every candlestick is just a compressed, visual user-testing report of a battlefield. It records exactly how buyers and sellers interacted over a specific slice of time. The open, high, low, and close tell you who won, by how much, and where the bodies were left when the clock stopped.
Please stop trying to memorize seventy different candlestick pattern names. You do not need to memorize "Three Outside Down" or "Bullish Abandoned Baby" to trade successfully. Treating charts like financial astrology is a fast track to cognitive overload.
Instead, look at a candle and ask four behavioral questions:
What actually happened here?
Who had control at the open?
Did that control change mid-session?
Where did the battle finally settle?
This approach works for any pattern—named or anonymous—because you are reading price behavior, not arbitrary labels. If you focus on the behavior, your toolkit shrinks from an unmanageable library down to five essential signals.
The Big Five: Price Patterns That Actually Carry Information
1. The Engulfing Candle (The Aggressive Takeover)
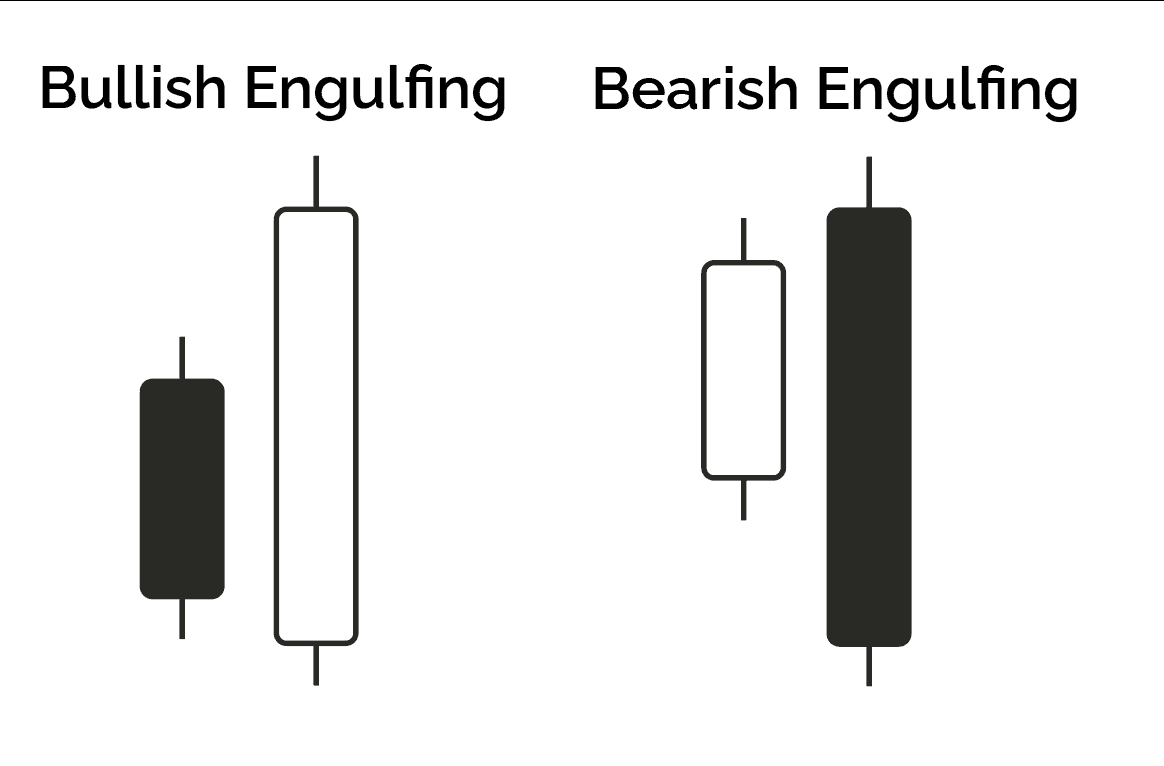
What It Looks Like: A candle whose solid body completely swallows the previous candle's body.
What It Means : Total corporate takeover. The prior period's move has been fully reversed and wiped out in a single session. Buyers completely overwhelmed sellers (bullish) or vice versa (bearish).
When It Matters: It matters at structural support or resistance, or at the end of a clear pullback in a trend. If an engulfing candle forms floating in the absolute middle of nowhere, ignore it. It’s just noise masquerading as signal.
2. The Pin Bar / Hammer / Shooting Star (The Hard Rejection)
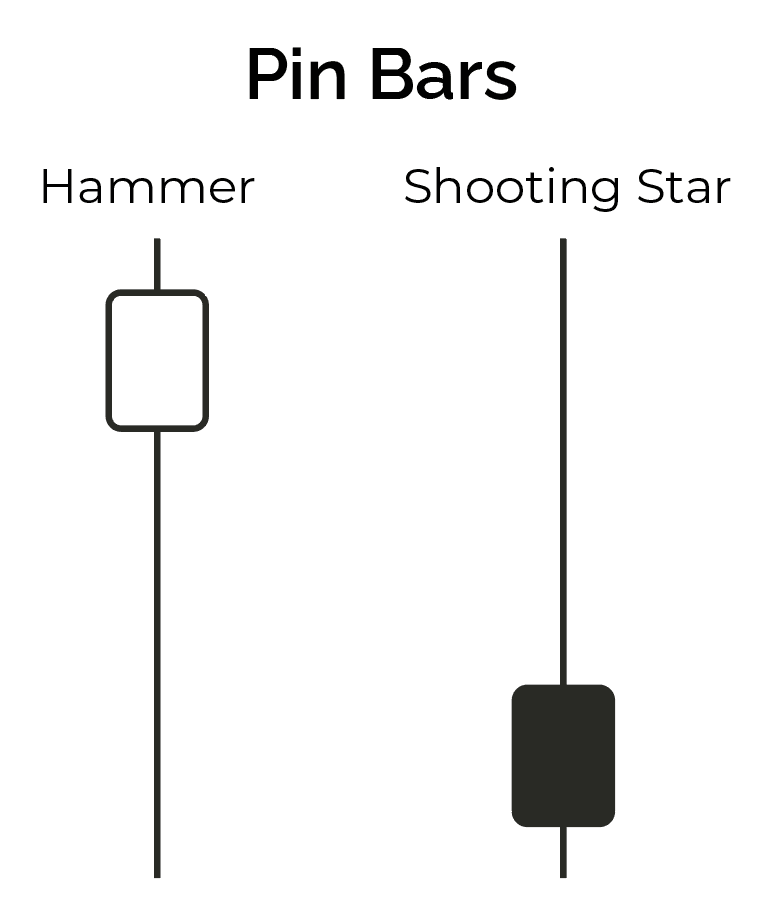
What it Looks Like: A tiny body jammed at one end, featuring a long, dramatic wick stretching out into the abyss. The Pin Bar is the larger classification. Hammer and Shooting Star are two types of Pin Bars.
Hammer (Bullish): Long lower wick, small body at the top.
Shooting Star (Bearish): Long upper wick, small body at the bottom.
What It Means : A violent, intra-bar rejection of a price extreme. A hammer tells you that sellers pushed price off a cliff, but before the session closed, buyers marched in and shoved price all the way back up. The long wick is the permanent scar left by that failed excursion.
When It Matters: The longer and sharper the wick relative to the body (aim for 3:1 or 5:1), the more decisive the rejection. This is your high-probability signal at major support or resistance.
3. The Inside Bar (The Strategic Pause)
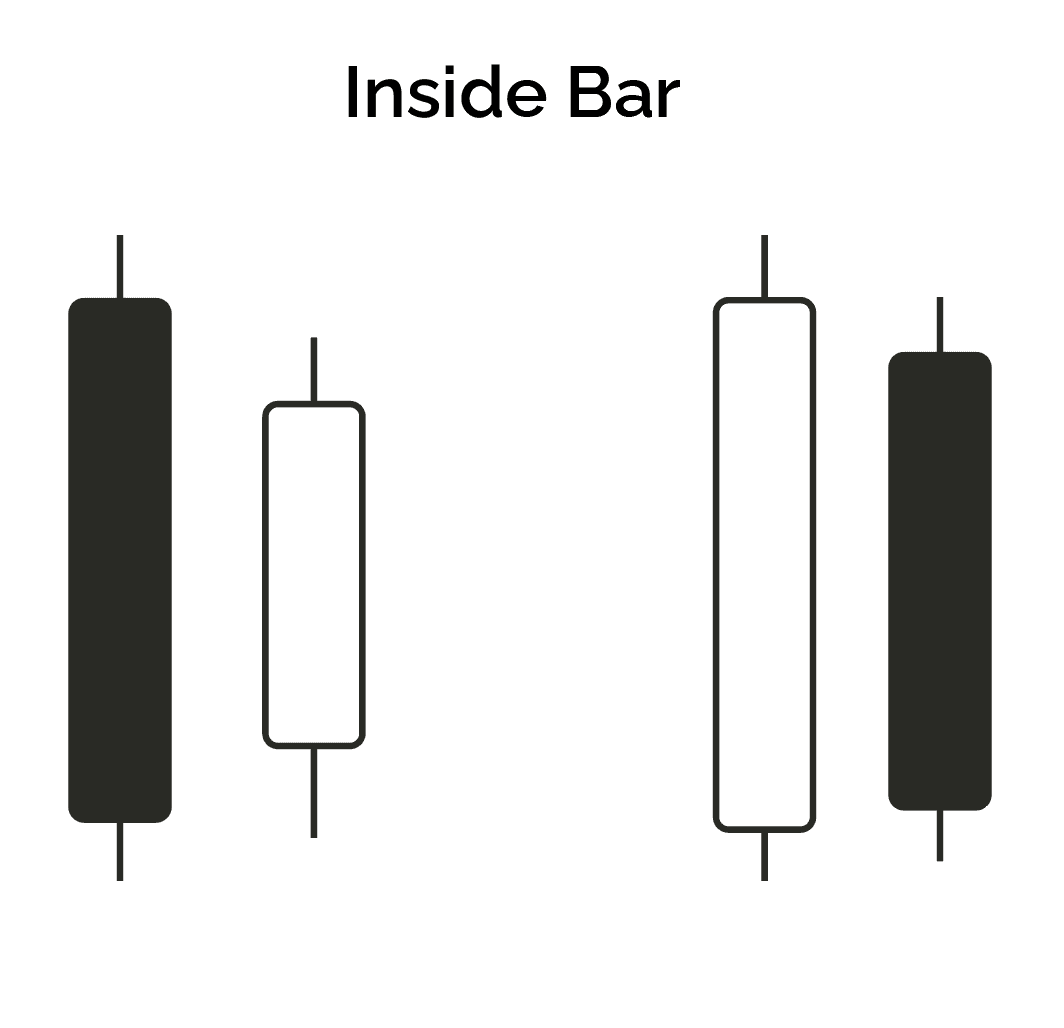
What it Looks Like: A small candle whose entire high-to-low range sits completely inside the boundaries of the previous candle. Color does not matter in this pattern.
What It Means : Compression. Indecision. The market tried to move, realized it didn't know where it was going, and pulled its blanket over its head.
When It Matters: Think of this as a coil spring. After a massive directional move, an inside bar signals a temporary pause. At a key structural level, it represents hesitation before a breakout or reversal. When price finally breaks and closes outside the inside bar’s boundaries, the spring uncoils.
4. The Doji (The Mutual Exhaustion)
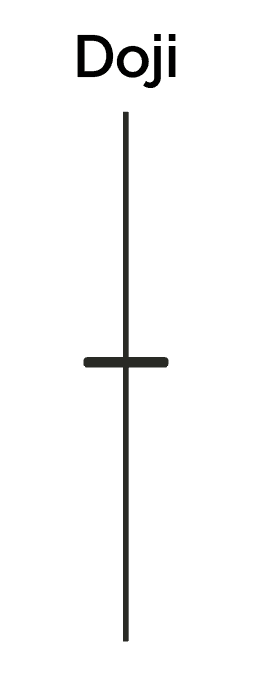
What it Looks Like: A cross or a plus sign. Price opened and closed at virtually the exact same level, with wicks on both sides.
What It Means : Complete gridlock. Both sides fought like hell for an hour, spent all their capital, and ended up right back at the starting line. Nobody won.
When It Matters: Mid-range dojis are common, boring, and utterly useless. But if a doji prints after a massive, overextended trend at a major level of historical resistance? It signals exhaustion. The engine is out of gas.
5. The Marubozu (The One-Directional Steamroller)
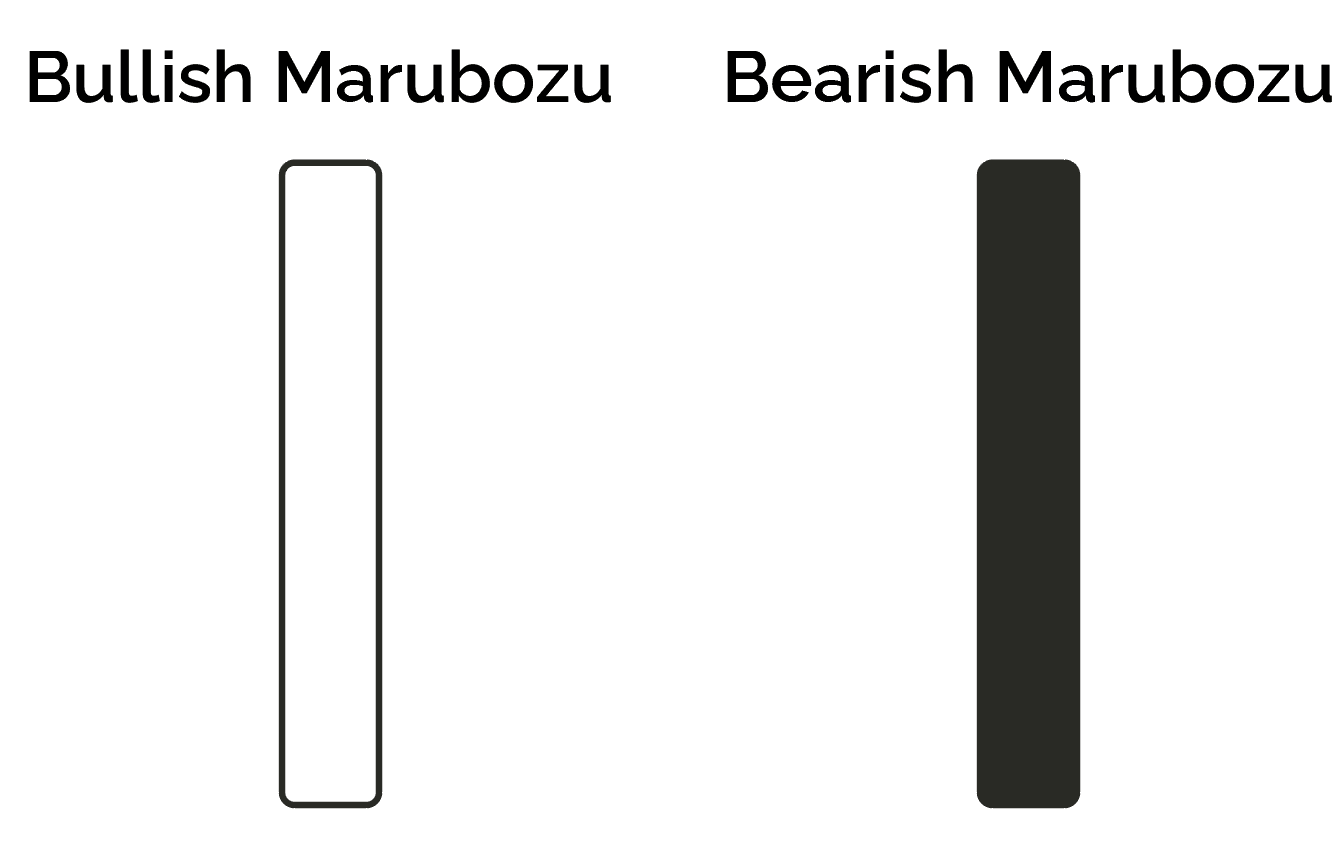
What it Looks Like: A massive, fat, solid brick of a candle with little to no wicks on either end.
What It Means : Absolute, unadulterated conviction. Price opened at one extreme and closed at the exact opposite extreme. There was no intra-bar hesitation, no second-guessing, and no mercy.
When It Matters: This is pure momentum. A bullish marubozu punching through a key resistance level isn't a fake-out—it’s a declaration of intent.
Putting Patterns to Work (Your 4-Step Mental Workflow)
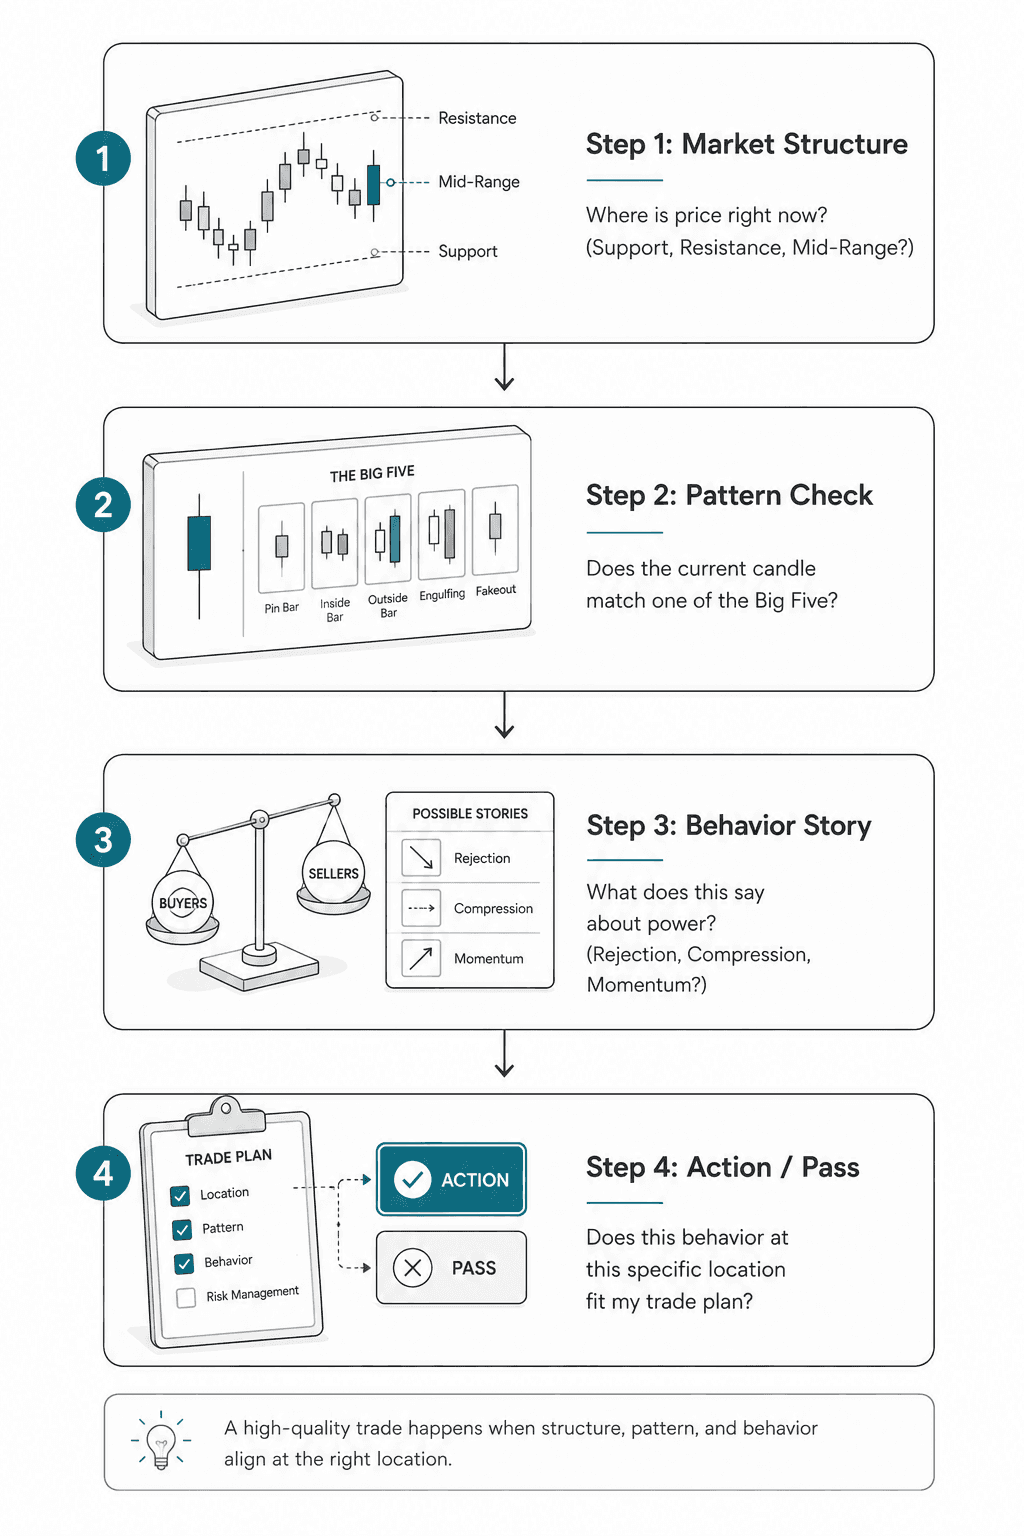
When you look at a chart, don't hunt for shapes. Follow this workflow to keep your cognitive load low:
Step 1: Market Structure
Look at where the price is in context. Identify how close it is to support, and resistance, or even if it's somewhere in the middle.
Step 2: Pattern Check
There are tons of patterns, but most of the action is around the big 5. It's great if you know 50 patterns, but for someone starting out, it's usually easier to follow the 80% rule and lower your cognitive load by focusing on the main players.
Step 3: Behavior Story
Some candlestick patterns are indicators of specific behaviors. Recognizing the candlestick pattern isn't enough, quickly review in your mind what that pattern usually indicates. Many of these candles indicate a change in momentum, some indicate a clear direction. Now look at that pattern in context of it's usually meaning and see if the chart is showing the same thing. Because just because a pattern exists on a chart doesn't mean it won't be a false flag.
Step 4: Make a Decision to Take Action or Pass
Even a chart pattern that is doing what it's supposed to do doesn't mean it's one you need to act on. That's why it's so important to learn what kind of trader you are, and have preset rules in order to make sure you are trading your plan. Not sure what your plan is yet? That's fair. There is plenty of training including an entire strategy series section to help you learn strategies and find the one that works best for you.
Most importantly, remember that the name of the pattern is irrelevant. What matters is whether the price behavior at this specific location gives you a positive mathematical expectancy.
What to Ignore: The Library of Clutter
Don't feel pressure to learn 100 patterns when you are starting out. Traditional candlestick literature loves to complicate things because complexity sells textbooks. You can safely delete things like the Evening Star Doji, Advance Block, or Dark Cloud Cover from your mental desktop. They aren't unique patterns; they are just over-complicated variations of the basic rejections and engulfing behaviors listed above.
Strip away the visual noise, focus heavily on the structural context, and read the story the candle is actually telling you. Your eyes (and your account balance) will thank you.
Success Criteria
After completing this lesson, you should be able to identify doji, hammer, engulfing, and pin bar patterns in a live chart, explain what each suggests about the balance of pressure in that period, and apply context (location, trend, key levels) to evaluate their significance.
Common Misconception
The more candlestick patterns you know, the better your trading will be.
The Truth: The set of genuinely useful patterns is small, and knowing twenty patterns is less valuable than understanding how four patterns behave across different market contexts.
FAQ's
Q: Do candlestick patterns work on their own as trading signals?
Q: Is one candlestick pattern more reliable than another?
Q: Do I need to memorize all the candlestick patterns?
Table of Contents
About Me

Krista Weber
After a career as a VP of UX and EdTech executive, I retired early—and quickly realized the traditional world of trading education is fundamentally broken.
As someone with a Master’s in HCI who specialized in the design of e-learning systems, I saw a massive gap: beginners aren't failing because trading is impossible; they’re failing due to massive cognitive overload and terrible instructional design.
This site bridges that gap. I’m applying the principles of learning science, systems thinking, and minimalist UX to strip away the market noise and teach trading the way it actually should be taught.
Stay in Touch
Some of the pages on my travel blog contain affiliate links. Whenever you buy something through one of these links, I get a small commission at no extra cost to you. As an affiliate, I only recommend products and services that I feel are high quality and helpful to my readers. Thanks for your support.
Read More

Open almost any trading platform and you'll see EUR/USD sitting next to XAU/USD, NQ, ES, and a dozen CFDs on stocks you've heard of. They all show up as candlesticks moving left to right, which quietly implies they're all the same kind of thing. They aren't. Before going deeper into any one of them, it's worth drawing the map.
Updated on Sep 6, 2026

Futures are standardized contracts tied to defined specifications and a future settlement date. They can look complex at first, but the mechanics become much clearer once you know what the contract specification controls. Here's what you actually need to know.
Updated on Sep 6, 2026

CFDs appear everywhere in retail trading – but most new traders couldn't explain exactly what they are or why that matters. Here's a plain-language breakdown, including the parts that most introductions skip.
Updated on Sep 6, 2026